
If your organization provides you with a business email (for example, yourname@companydomain.com), you can easily access it in Microsoft Outlook or any other email app.
This guide walks you through both automatic and manual setup options — plus how to back up your emails safely.
If your email service supports autodiscover (most modern servers do), Outlook can configure everything for you automatically.
Here’s how:
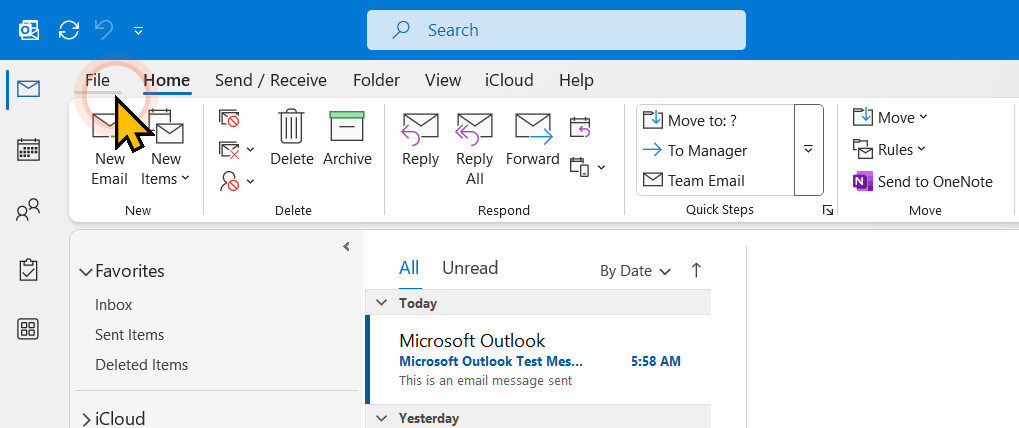
1. Open Microsoft Outlook
2. Go to File → Add Account.

3. Type your full email address (e.g., yourname@companydomain.com) and click Connect
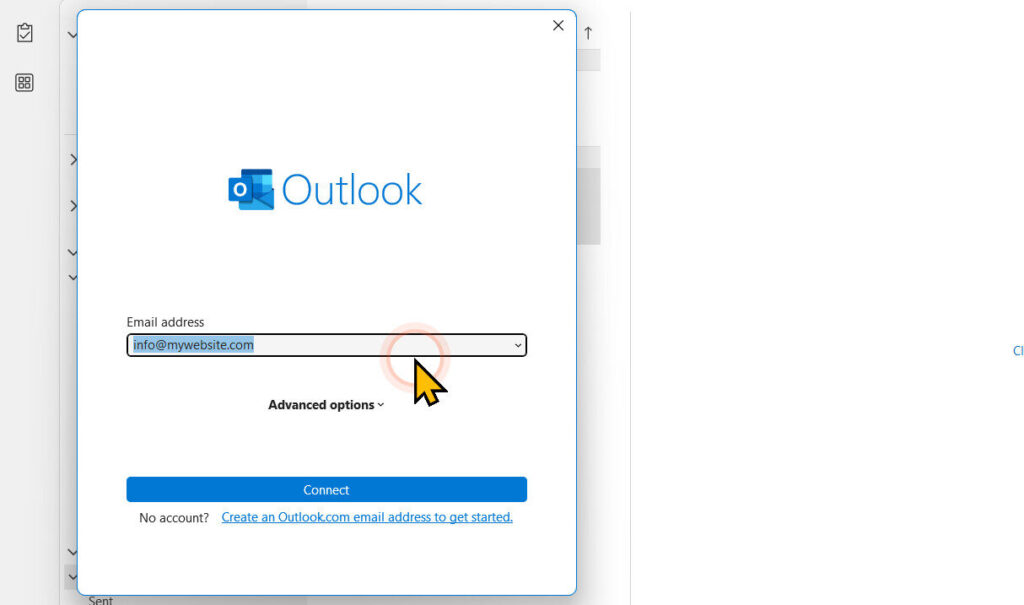
4. Enter your email password when prompted.
5. If Outlook asks whether to allow automatic configuration, click Allow or Yes.
6. Wait a few moments for Outlook to complete the setup, then click Done.
That’s it! You can now send and receive emails through Outlook.
✅ That’s it! You can now send and receive emails through Outlook.
Tip: The same steps usually work on Outlook Mobile and most other email clients that support autodi
If Outlook can’t automatically detect your server settings, you can configure them manually using your IMAP and SMTP details.
These values vary depending on your hosting provider, but here’s a general example:
| Setting | Incoming (IMAP) | Outgoing (SMTP) |
|---|---|---|
| Mail Server | mail.yourdomain.com | mail.yourdomain.com |
| Port | 993 | 587 |
| Encryption Type | SSL/TLS | STARTTLS |
| Username | your full email address | your full email address |
| Password | your email password | your email password |
| Authentication Required | Yes | Yes |
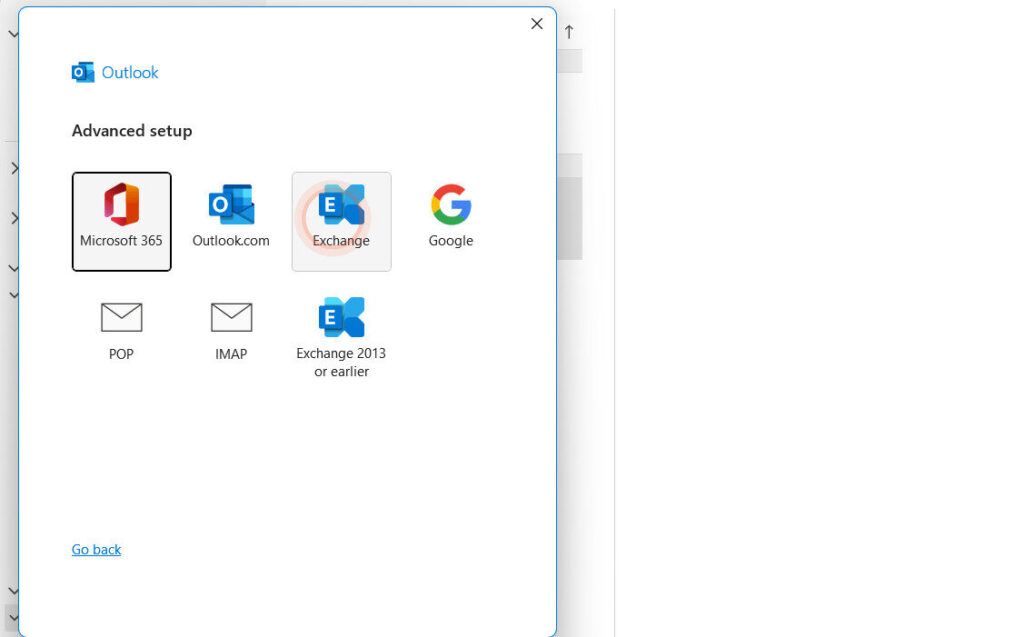
After entering your email address, Outlook may ask you to choose between a few options such as Microsoft 365, Outlook.com, POP, or IMAP.
Choose POP or IMAP — depending on what your IT team recommends.
Then fill in the details provided by your hosting provider:
mail.yourdomain.com)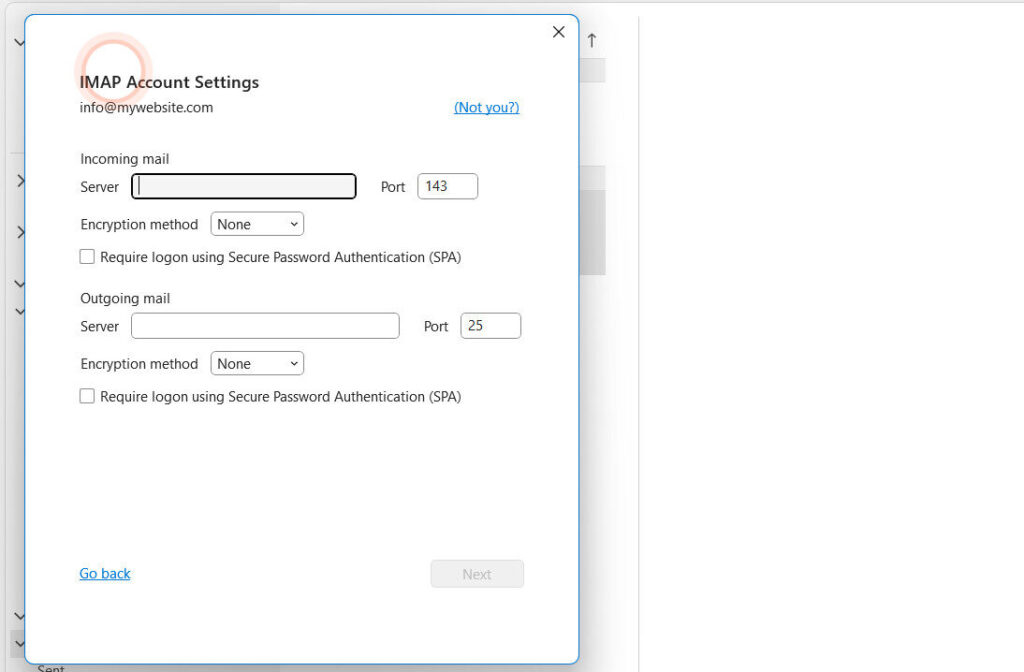
Once you’ve entered the correct information:
Prefer using email in your browser? You can also log in via webmail — no setup required.
Ask your hosting provider or IT team for your webmail address. It usually looks like this:
👉 https://mail.yourdomain.com/webmail
Simply visit the link, enter your email address and password, and you’ll have full access to your inbox.
To avoid losing important messages, it’s good practice to back up your mailbox regularly. Outlook allows you to export all your emails into a single file.
You now have a .pst file that contains all your messages.
.pst file you saved.If you can’t send or receive emails, check the following:
If issues persist, contact your IT support or email hosting provider.
Setting up your company email in Outlook doesn’t have to be complicated.
Most times, Outlook can configure everything automatically using autodiscover.
But even if you need to do it manually, just follow the steps above and your mailbox will be ready in minutes.
Remember to back up your emails regularly and confirm your settings with your IT team if you’re unsure about any details.